
for English, scroll down
Hoe je rimpelrokjes op elastiek moet maken, hoef ik jullie waarschijnlijk niet meer uit te leggen. De tutorial der tutorials daarover is ongetwijfeld die van Mina Dotter (vroeger Polkadotjes). Of in het Engels deze blogpost. Maar onlangs leerde ik, nota bene als gevolg van mijn eigen aan Tinne opgelegde sew challenge criteria, nog een makkelijkere methode, die je op haar blog kan terugvinden. Zeg nu zelf: een rimpelrokje zonder elf te moeten rimpelen! En voor de kindjes met gevoelige vellekes, vond ik hier een uitleg om de binnenkant wat properder af te werken. Wat ik nog niet vond, was hoe ik zo een rokje propertjes kon voeren. Ok, toegegeven, moeilijk is het in feite helemaal niet. Veel denkwerk vergde het dus niet 😉 Maar misschien bespaar ik anderen dat denkwerk wel, dus bij deze leg ik het ook graag eventjes uit!
")
")
")
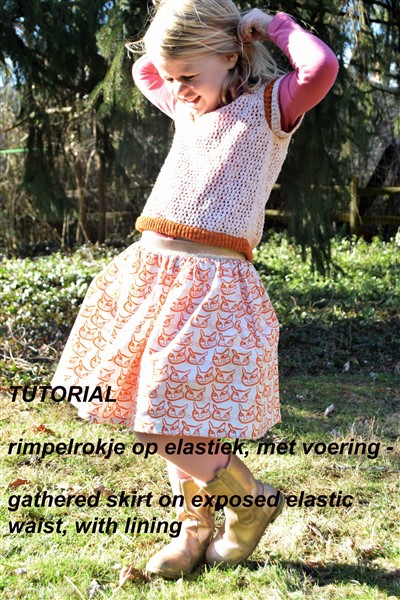
Ik ging er eigenlijk maar naar op zoek toen ik per se een rokje met dit geweldige poezestofje wilde maken, een print van Lotta Jansdotter voor Windham Fabrics. Het stofje was ten eerste lichtjes doorzichtig, en ten tweede misschien een beetje frisjes zo voor de winter (ik maakte dit rokje in november…). Dus een voering leek me ideaal. Maar zo twee lagen gerimpelde stof vanachter aan een elastiek, dat leek me niet zo aangenaam om dragen. En ook niet zo mooi.
")
")
")
Dus ging ik aan de slag! Dat deed ik zo:
- Ik mat de lengte na op Sia zelf, en tot aan de knie was dat 35 cm. Ik gebruikte verder de breedte-afmetingen van Polkadotjes voor de buitenstof. Zo had ik dus twee lappen van 35cm op 70 cm. De voeringstof maakte ik gewoon op gevoel een pak minder breed en een stuk korter, zodat de voering ook een pak minder gerimpeld zou zijn dan de buitenstof. Ik denk dat ik twee lappen van 30cm op 50 cm had. De elastiek mat ik ook na op haar buikje.
I measured the length of the skirt on my daughter, and used the tutorial of Mina Dotter for the width of the skirt parts. This tutorial is in dutch, but it has a nice scheme in centimeters for the age range 2 y (92cm) till 12y (152cm), and the pictures are very clear to follow. There is also a tutorial in English however, which you can find on the blog Sewing Like Mad I cut the lining a little shorter and less wide. This way I ended up with 2 pieces of 35cm (length) by 70cm (width) of the outer fabric, and 2 pieces of 30cm by 50cm for the lining. I measured the width of the elastic on her as well.
. - Je naait de uiteinden van de elastiek aan mekaar vast zodat die een cirkel vormt.
You stitch the ends of the elastic onto each other, in order to make a circle with it.
. - Je naait ook de twee delen voering aan mekaar, en de twee delen buitenstof, zodat je twee cirkels stof hebt. Dit lees je allemaal veel meer gedetailleerd in de uitleg van Mina Dotter!
You also stitch the 2 pieces of the lining together, and the 2 pieces of the outer fabric. This is all explained in detail in the 2 tutorials I mentioned above in step 1.
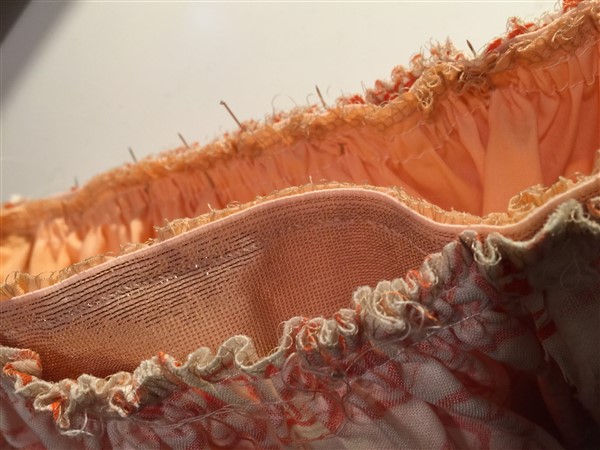
. - Dan rimpel je eerst de voering, tot de voeringstof even breed is als de elastiek. Je speldt de voeringstof vast aan de elastiek, waarbij je de goede kant van de voeringrok tegen de slechte kant van de elastiek legt, zoals je hopelijk op de foto’s kan zien.
Je kan echter ook de goede kant van de voering (buitenkant voeringrok) tegen de slechte kant van de elastiek leggen, dan zit de naad van de voeringrok onder de buitenstof en zie je die niet aan de binnenzijde van de rok als je dochtertje die aan heeft.Then you gather the lining first, until the lining skirt is as wide as the elastic. Pin the lining to the elastic, with good side of the lining to wrong side of the elastic, as you can hopefully see on the pictures.
You could however also stitch the good side of the lining to the wrong side of the elastic. This way the seams are underneath the outer fabric, and not visible on the inside of the whole, finished skirt.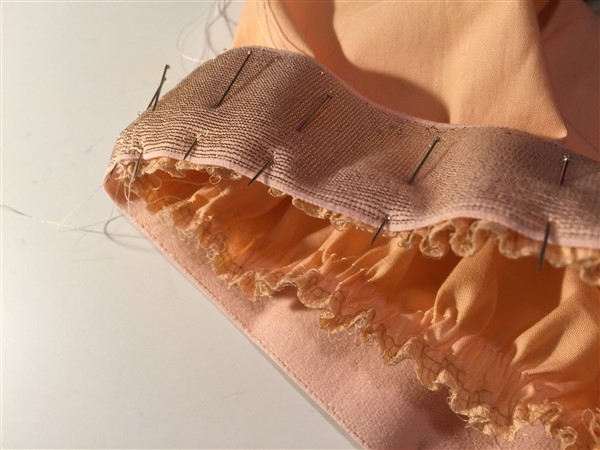
- Je naait de voering en elastiek op deze manier aan mekaar. Je naait dus op de goede kant van de elastiek. Gebruik een elastische steek, en gebruik geen te grote naadwaarde.
You stitch the lining and the elastic together, stitching on the good side of the elastic. Use an elastic stitch, and not too much seam allowance.
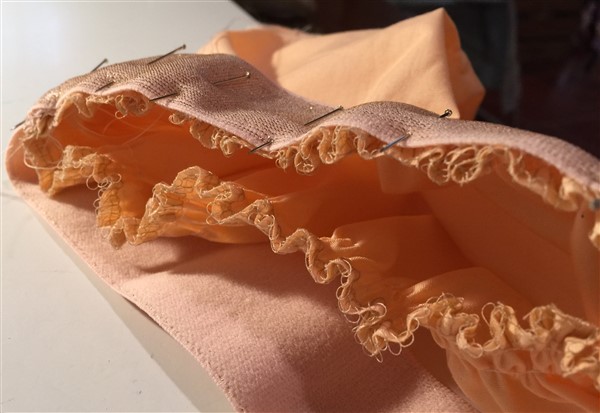
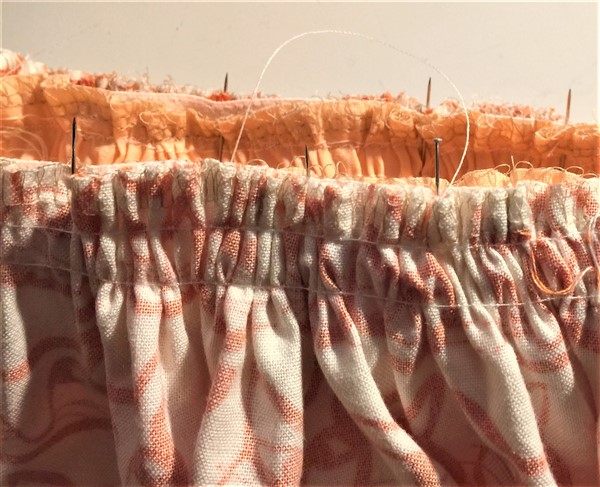
- Dan rimpel je de buitenstof op dezelfde manier, dus tot die ook even breed is als de elastiek. Die gerimpelde buitenstof speld je met de goede kant op de goede kant van de elastiek, zoals je op deze foto’s kan zien.
Then you gather the outer fabric in the same way, until it is as wide as the elastic and lining skirt. The outer fabric has to be pinned to the elastic with good side of the fabric on the good side of the elastic, as is pictured.

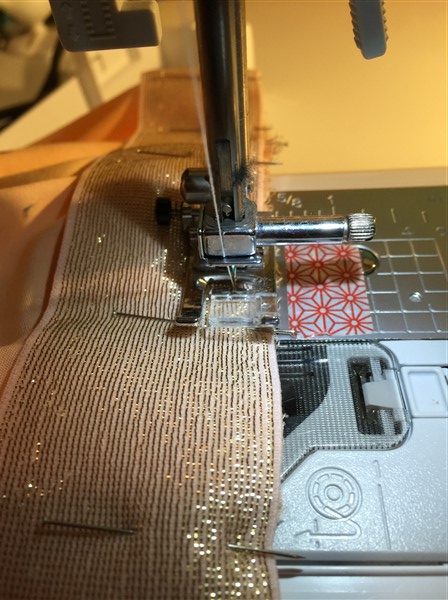
- Je naait dan door de drie lagen. De elastiek zit dus tussen de buitenstof en de voering.
Stitch through the 3 layers: outer fabric, elastic, lining fabric. The elastic is in between both fabrics.

- Nu is je rok eigenlijk al klaar! Er is geen zichtbaar stiksel op de buitenrok, noch op de elastiek, en zelfs niet aan de binnenkant van de rok.
Your skirt is finished! No visible seams on outer skirt, elastic, nor on the inside.

Je kan dit desgewenst nog doorstikken, om het platter te maken, maar na een strijkbeurt vind ik persoonlijk dat het ook al plat genoeg is. Maar dat is een kwestie van smaak natuurlijk…If you want, you can topstitch the skirt right under the elastic to make it a little more flat, but after some ironing I found it to be good enough. It’s a matter of taste of course…


Ziezo, hopelijk hebben jullie hier iets aan? Of zagen jullie elders al iets soortgelijks?
Als er iets niet duidelijk is, laat het me dan zeker weten! En als jullie deze tutorial gebruiken om een gevoerd rokje te maken, mag je het me altijd laten weten, of een linkje achterlaten in de reacties als je een blog hebt.
Follow (bloglovin)
Een reactie maakt mij altijd blij!
patroon/pattern: /
stof/fabric: Mirre in Mandarine by Lotta Jansdotter for Windham Fabrics – Hawthorne Threads
Making a gathered skirt on elastic is not difficult at all. There are probably enough tutorials about that online. In Belgium there is one tutorial that probably everyone knows, from the blog Mina Dotter (formerly known as Polkadotjes). In English I found this tutorial on it, by Sewing Like Mad. Recently I learned a method that seemed to be even easier and faster, since it resulted in a gathered skirt, but skipped the gathering part. You can find more information about that on Tinne’s blog Naaisgerief. I also found a tutorial on how to make it easier for the little ladies with a sensitive skin, who don’t want to feel the gathered seams on their skin. These last 2 tutorials are in dutch, but with clear pictures to guide you through!
The one thing that I had not yet seen, was how to make a lined version of this gathered skirt on elastic. I wanted to find that because I had bought such a nice cat fabric, a print from Lotta Jansdotter for Windham Fabrics, which I purchased at Hawthorne Threads. It was a little bit shine-through, and it also seemed a bit on the cold side for the winter months (I made the skirt in november…). So since I couldn’t find a tutorial I just figured it out myself. Which, I must say, was not exactly such a hard job 🙂 It is actually really easy, but to save you the thinking, I am writing a little tutorial about it here 🙂 Because I thought it would be easier to see the steps next to the pictures, and I didn’t want to put the same pictures here again, I wrote the English explanation underneath the dutch in the above text, together with the pictures. I hope it all makes some sense. If you have by any chance any question, don’t hesitate to ask!
So I hope you like this little tutorial? Or did you already see the same thing on another blog? I’m curious to hear from you!
Follow (bloglovin)
Thank you for visiting my blog!
Any comment is of course highly appreciated

ik maak er eens werk van! 😉 nog nooit bij stilgestaan eigenlijk maar geeft ook een mooie afwerking! bedankt! x
LikeGeliked door 1 persoon
graag gedaan en dankjewel 😉
LikeGeliked door 1 persoon
Leuk!! Ga ik ook eens proberen.
En totaal naast de kwestie, maar dat truitje is ook prachtig! 😊
LikeGeliked door 1 persoon
haha,dankjewel 😉 naast de kwestie mag ook he 😉
LikeLike
Al lang op zoek naar deze, nog nooit gedurfd… Bedankt, nog net op tijd voor de zomer rokjes!
LikeGeliked door 1 persoon
super! graag gedaan!!
LikeLike
Ik vind het heerlijk als iemand anders het denkwerk voor mij wil doen 😉
LikeGeliked door 1 persoon
idd, dat is altijd leuk he 😉 succes ermee 🙂
LikeLike
mooi!!!
LikeGeliked door 1 persoon
dankjewel!
LikeLike
Mooi! En ook heel nieuwsgierig naar het truitje! Is daar een patroon van?
LikeGeliked door 1 persoon
Dankjewel!! Het truitje is een gekocht truitje, daar heb ik geen patroon van, sorry… Het is van Fred & Ginger van een tweetal jaar geleden denk ik… sorry dat ik je daar niet mee kan helpen!
LikeLike
Net op deze manier een rokje afgewerkt. Goed gelukt dankzij jouw tutorial! Bedankt!
LikeGeliked door 1 persoon
super!! Keileuk dat je dat effe komt zeggen! Dankjewel!
LikeLike
Hallo, ik wil daar straks mee starten se!
Je zegt om een elastische steek te gebruiken,bij nuller 5, wa bedoel je hiermee, gebruik jij een elastische draad ? Of zet je je machine op een bepaalde stand ?
LikeGeliked door 1 persoon
Hoi Melissa! Super dat je er ook eentje gaat maken! Sorry voor mijn ietwat late reactie! Ik bedoel daar een stretchsteek mee op de naaimachine. Dat is inderdaad niet zo heel duidelijk omschreven als ik dat nu zo terug lees, sorry! Dus geen elastische draad, maar de steek op de naaimachine die je gebruikt voor rekbare stoffen. Succes ermee!
LikeLike
Dank voor de duidelijke uitleg, net een rokje gemaakt met jouw tutorial. Dank je wel!
LikeLike
Heel duidelijke uitleg en mooi afgewerkt
Dank je wel Agnes
LikeLike
Mooi en duidelijk, netjes afgewerkt, dit probeer ik morgen, zo kunnen de stofjes gebruikt worden voor de start van het nieuwe schooljaar !
LikeGeliked door 1 persoon
sorry voor de late reactie!! Maar superfijne reactie, ik ben blij dat je het hebt kunnen gebruiken!! xx
LikeLike